Adjust Printing Preferences
- Open the Semieta Software Suite application (please note – this must be using an admin level login).
- Click ‘Menu’ in the top left-hand corner.
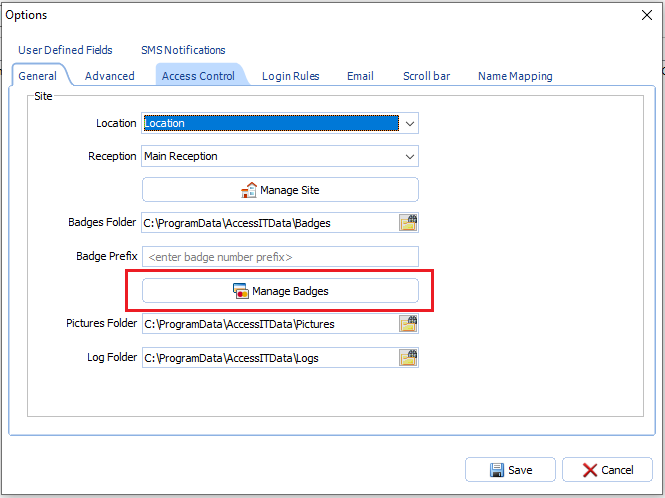
- Click ‘Options’ in the bottom left-hand corner and then a new screen will open.
- Click on ‘Manage Badges’:
- Choose which badge you want to adjust the printing preferences for and click ‘Open’ (there may be multiple badges here, so you will need to know the file name exactly).
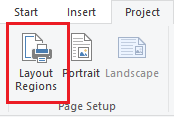
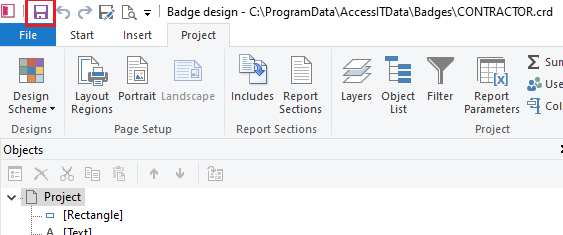
- With the badge open, click on the ‘Project’ tab in the task bar (at the top).

- In the section called ‘Page Setup’ (you should see this directly underneath the ‘Project’ tab), click on ‘Layout Regions’ and a new window called ‘Layout’ should open.
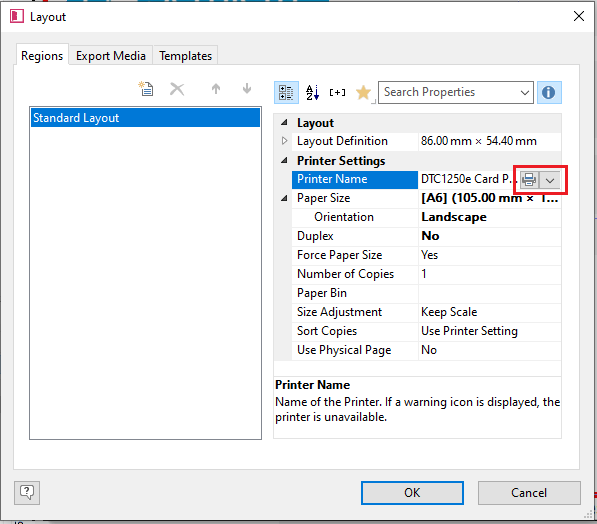
8. On the right-hand side, you will be able to select the printer using the dropdown arrow:
9. Once you have chosen the Printer, you will need to select the page size. To do this, click on the paper size column to the right of the ‘Paper Size’ section and another drop down arrow will appear:
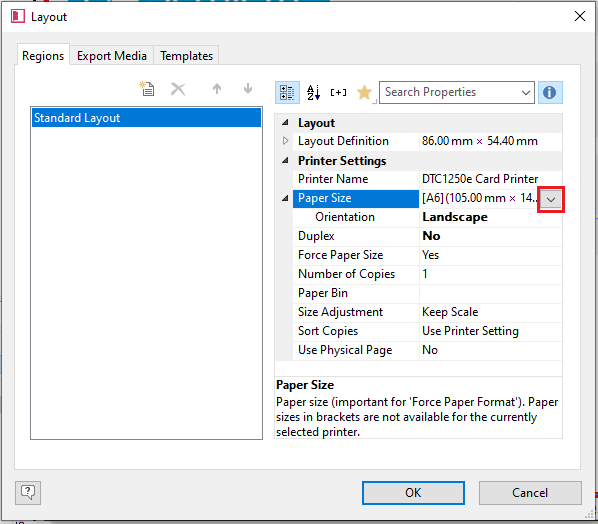
(Please note: For an ID Card printer this should be set already to a CR80 card.)
11. Once you have chosen the printer and setup the page size, change the orientation following the same steps as above.
12. To adjust any other settings, please follow the steps above. Click ‘OK’ at the bottom of the window to close it once you have made your changes.
13. You will now be back at the badge design screen. You will need to click ‘Save’ (see below) in the top left-hand corner of the screen:
14. This will now have saved the print profile to this badge.
15. Close the badge design and commence a test print to check changes made have been successful. Open and repeat the above steps for any other badges that you wish to use or for further amendments.